Table of Contents
Rule #1: Have a link to your before and after gallery on your website’s menu
With so much information available on the internet today, if someone can’t find what they need quickly and easily, they won’t linger on a web page for long. Your competition is one click away which is why it’s necessary to have a direct link to your before and after gallery on your menu
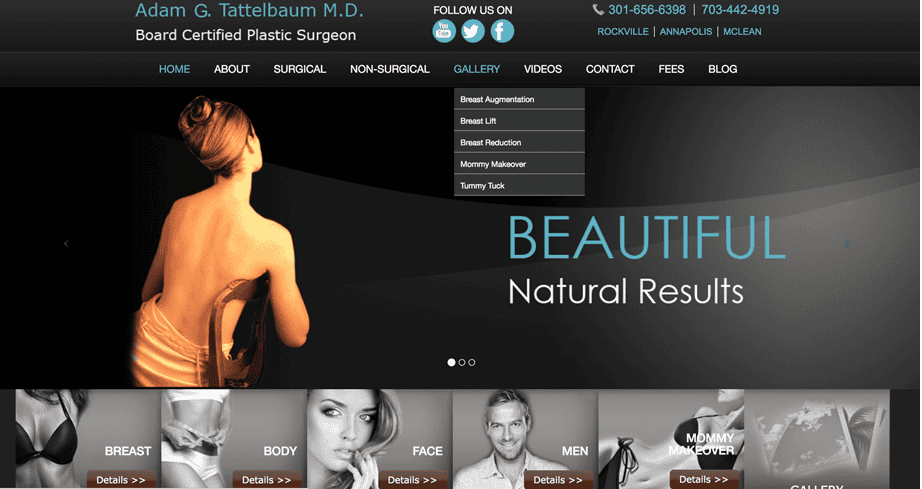
AT Cosmetics displays the link for the before and after gallery prominently on their website’s menu and adds calls-to-action for their gallery just above the fold. When a visitor hovers over the ‘GALLERY’ option on the menu, they are shown which procedures have galleries. These strategies make it easy for potential patients to find exactly which gallery they’re looking for, reducing the amounts of clicks to the desired destination.
Takeaway: Before and after gallery is the highly valuable real estate on your website. Make it as accessible as possible. Reduce the number of clicks for a visitor to find what they are looking for.
Rule #2: Optimize the SEO juice with title and image/alt tags
The best way to optimize SEO for your before and after photo gallery is to properly use title and image (alt) tags for each photo and page. To learn more on how you should set up your title and image tags, please check out a great blog post titled “Image SEO: alt tag and title tag optimization”.
Takeaway: Having better SEO translates into more consumers finding your page online, which means more visitors. With optimized before and after galleries, those visitors will result in more appointments and more revenue.
Bonus tip: Adding sharing icons on your gallery will also give you a boost in engagement which results in a Google ranking factor for SEO.
Rule #3: Clicking on thumbnails should greatly enlarge photos
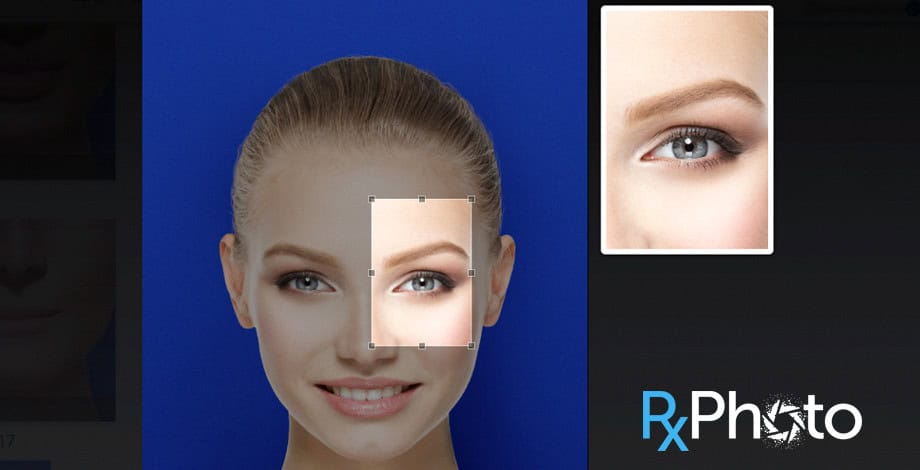
Too many times, we only see thumbnail versions of images that can’t be enlarged, or if you can enlarge them, they can only become 20% bigger. A great before and after gallery has images that can be enlarged by 100% or more so that potential patients can clearly see results. The Nielsen Norman Group asserts that not being able to enlarge photos is one of the top 10 web design mistakes, even though the technology is available to website developers. Want more proof? Amazon states that “zoom has proven to enhance sales.” If your gallery does not have a zoom-in feature or a way to enlarge your photos, you are missing out.
Takeaway: If a visitor is interested in a photo, they will be more engaged in a larger photo than a smaller one.
Rule #4: When applicable, show multiple angles
The same study by the Nielsen Norman Group also asserts that consumers like alternate views of photos online. This means that the more angles a provider shows, the more likely someone is to click on the photo (which should open as an enlarged version of the photo…see rule #3.)
Do a personal study the next time that you shop on Amazon and are comparing two similar products. Does the one with more image views and angles win?
Takeaway: If a visitor is interested in a photo, they will be more engaged in it if there are multiple angles.
Rule #5: Relevance
For a before and after gallery to be viable, there must be many photos from a variety of patients: both men and women of different ages, body types and skin tones. Potential clients will react more positively to a before and after photo of a patient with which they can identify. The photos allow the visitor to imagine using your practice to obtain their own desired results.
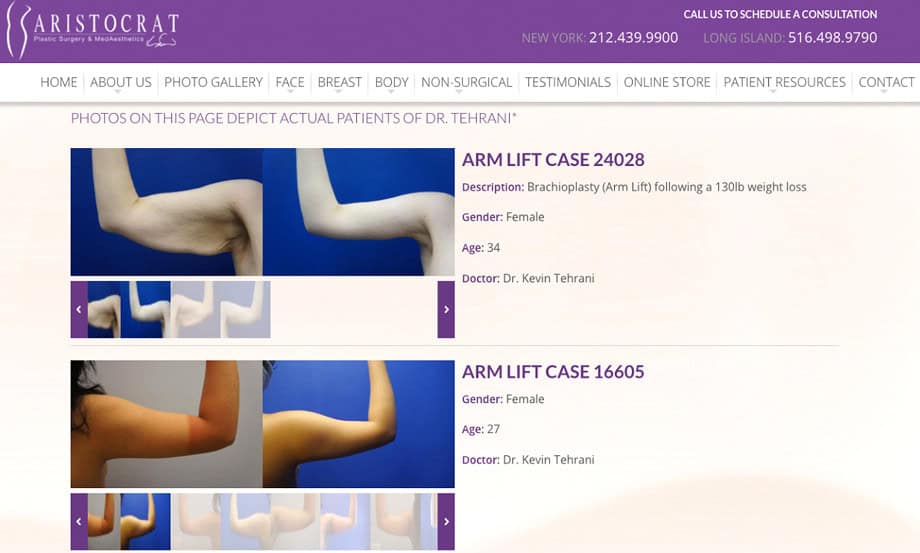
The Aristocrat Plastic Surgery and Med Aesthetics gallery is a good example of depicting women of different ages and skin tones.
“Relevant patient photos are very important to consumers. As future patients shop online, it’s best to deliver your content to them in a way that they are used to shopping in their everyday lives. Like Amazon.com or Zillow.com, consumers should be able to sort and filter your galleries to see patients who are similar to them. These strategies will drive visitors to convert into a consultation.” – Andre Riley of Doctorlogic.com
Takeaway: A 50-year-old male looking to have a neck lift procedure will be less interested in the before and after photos of a neck lift procedure of a 27-year-old woman than of another man in his 50s. Ideally, an aesthetic physician’s before and after gallery should reflect the needs of their target population in order to attract new business.
Rule #6: Consistency
Your photo gallery should reflect the quality of your work, therefore consistent and high quality photos are essential. Having more consistent before and after photos can be as easy as capturing all of your patients using the same type of device. Capturing all of your patients from the same angles, with the same background and lighting is essential to having a consistent before and after photo gallery. RxPhoto recommends a solid blue or gray background because it contrasts nicely with all skin tones and draws the viewer’s eye to the body while eliminating any distractions.

Advanced Cosmetic Surgery NY is a good example of how consistent posing and the use of the same background can make for better photos. It not only showcases patients of different skin tones but also uses consistent posing and backgrounds, allowing potential patients to focus on the physician’s consistent results.
Takeaway: The eye is attracted to the differences in the photos which takes the focus away from the results of the procedure.
Rule #7: Watermark your photos with your logo
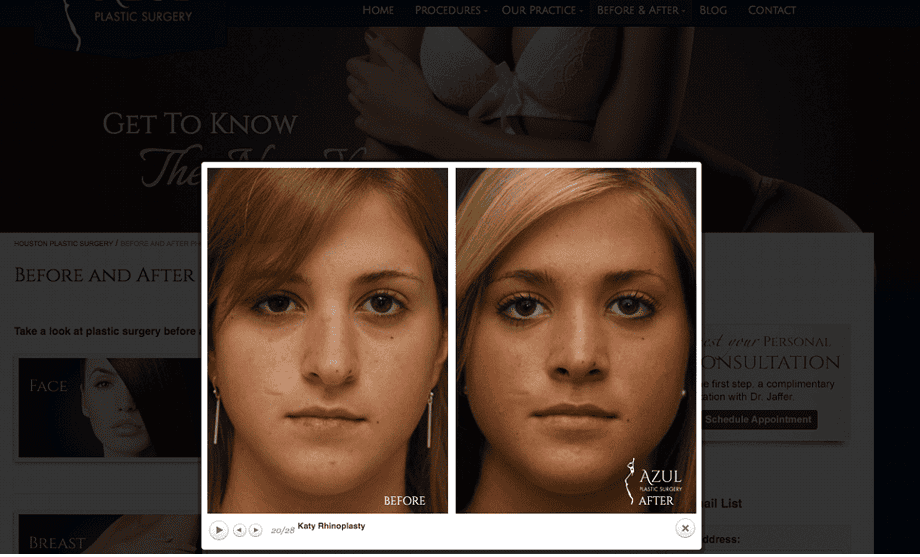
In the digital age, it is too easy for anyone with internet access to steal a photo from a webpage. Azul Plastic Surgery does an excellent job using a watermark of their logo on their gallery’s photos because it eliminates the ability for anyone else to pass those results off as their own. Watermarking photos is a standard feature with many medical photography platforms such as RxPhoto.
Takeaway: Your patients are your canvas and their results are your masterpiece. Protect the images of your masterpiece.
Rule #8: Responsive for mobile
The Pew Research Center found that 63% of mobile phone owners primarily access the internet from their phones, not their computers. This means that increasing websites are developing two versions of their websites: one for people using computers, and one for people using their phones to browse the internet. Browsing a before and after gallery made for a computer on your phone can be tiresome; everything is smaller, meaning that lots of zooming are required, making it difficult to quickly and easily access what a consumer is looking for.

Vivedigital did a great job reporting on the importance of a “mobile-friendly” website. The goal is to modify your desktop website’s format to create a similar user experience on mobile.
Takeaway: Don’t lose 63% of your potential clientele because your website is not optimized for mobile.
Rule #9: Include a photo save feature
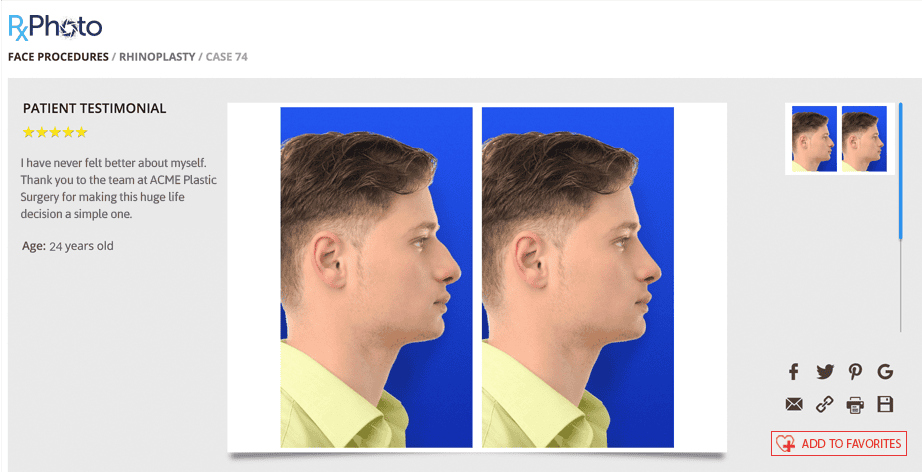
If a patient likes a photo – especially one that relates directly to them (see rule #5) – they should be able to save it. Physicians can utilize the save-a-photo feature to communicate with website visitors by asking the user to opt-in for the practice’s newsletter and email alerts before the save-a-photo feature is enabled.
Takeaway: Understanding the savvy cosmetic consumer’s journey will help you turn your website into a lead-generation tool.
Bonus tip – you can set up a retargeting campaign by placing a snippet of code on your photos. This will help you market a specific service that you provide to an interested consumer.
Rule #10: Use your photo gallery to promote the benefits of multiple services
At RxPhoto, a major benefit that practices realize is how RxPhoto helps practices market and illustrate their services. The intended result of one of RxPhoto’s tools is educating current single user patients on the benefits of other procedures that your practice provides. Your before and after gallery can mimic this strategy by showing patients who use two or more services at your practice to help educate single procedure patients on the benefits of multiple procedures.
Takeaway: Maximize all opportunities that your visuals allow. Using before and after photos to educate your patients builds a lifelong customer base that is loyal to your brand.
Rule #11: Add Calls to Action
We have established that your before and after gallery is the most viewed and most important page on your website. Too few medical practices use this opportunity to capture leads from their before and after galleries. You may have noticed that on the bottom right of this page, we have the ability for you to subscribe to our newsletter. Even though asking you to subscribe to our content is not officially a call to action, it is just one idea that you should add to your own before and after gallery. If you want to maximize the leads from your before and after gallery, you should add a “Call-To-Action,” sometimes referred to as a CTA. On your before and after gallery, if a client is looking at an “anti-aging” before and after photo, in text, underneath the photos, you can ask a simple question that persuades your visitor to take action.
The bottom line: We live in a visual world and your competition is just a click away. Your before and after photo gallery is your first opportunity to highlight your work. For some patients, it might be the deciding factor between your practice and your competitor. To make your first digital impression count, your gallery needs to reflect your current and potential patients’ desires for clear, consistent photos, tailored to their needs.
